Showing posts with label DIY/Crafts. Show all posts

7.12.2012

Finally a DIY Project...


is about to be happening around here.  This weekend my in-law's neighborhood is having their annual yard sale and the Hubs and I spent the evening going around the house gathering up some random stuff to take over there tonight.  One of the things we sent over was our current tv stand.  

My mother-in-law offered me a long dresser she's had in her basement and doesn't want.  We all know how much I love a good furniture re-do, even more so when it's FREE!!  So, here she is in her "glory" right now. 


So, I'm thinking of moving the middle drawers up to the top.  And then tearing out the bottom two rows of drawers.  We have one of those older big stereo's we still listen to that I'd love to still use, but keep it out of sight.  So am sure the Hubs will come up with some doors or something.  Also, everything on top of the dresser now (PS3, Dish box, and router) will be hidden in the top drawers.  

As for the color I'm thinking, something along this picture that I saw on crackgram earlier this week.  I want to add some pops of color - am done being "afraid" and going with whites and blacks. 


What are your thoughts?  Always open to suggestions!


Pin It

6.28.2012

DIY - Jewelry Cleaner


Courtesy of Pinterest I came across an at home way to clean my jewelry.  I was excited to find this recipe as it was all things I had on hand, and nothing harmful! 

What you'll need: 
- 1 Tbsp Salt
- 1 Tbsp Baking Soda
- 1 Tbsp Dish Soap
- 1 C Water
- 1 PC Aluminum Foil 

Directions: 
- Heat the water up in the microwave for 1 or 2 minutes. 
- Cut a pc of foil that will cover the bottom of a bowl, like a cereal bowl. 
- Pour the hot water in the bowl.  Pour in the remaining ingredients.  Place in your jewelry - let it stand for 5-10 minutes. Rinse jewelry in cool water and wipe off with a soft cloth.  Discard solution after each use. 

This has worked great with all of my jewelry - have even used it on some of my great grandmother's pieces that have been handed down to me.  I also use a soft toothbrush to scrub the stones on some of my pieces. 
 

Here's a picture of the aluminum foil after a cleaning - see that the darkness on the foil?  That's all of the junk it got off my jewelry. 
 

Pin It

9.29.2011

Baby/Nursery Sewing Projects

During my pregnancy with B, I knew there were some things that I wanted to try sewing for her nursery and some of the baby items we’ll be using.  I had previously shown the burp rags I made, here.  Next up I wanted to recover the bumpers that we had in A’s nursery.  Personally, I found it incredibly hard to narrow down fabrics.  I searched tons of places on-line and finally we just headed to Joann’s and the Hubs saw the outer fabric first, knew it was perfect and had the colors I wanted!  If I ever recover a set of bumper pads again, I definitely want to do the piping detail, which I didn’t do on B’s.

2011-09-12 12.58.01

2011-09-12 12.58.09

Next up I wanted to make another boppy cover.  I had to improvise since I bought the wrong yardage then what was recommended and a zipper half the size that was recommended, can I blame pregnancy brain and not writing it down?  Thankfully, it still turned out great, love the colors and that one side is a flannel, soft and warm.

2011-09-05 16.23.58

Last project was actually completed by the Hubs.  Recovering the infant carrier carseat.  Only thing I helped with was tearing out all of the seams.  The fabric for this we checked out the home décor fabrics as they are more heavy duty.

2011-09-18 22.36.32

IMG_8802

Doing these projects has increased my love of sewing so much.  All fabrics were bought on sale and with coupons and I love how each of these are personalized especially for her, especially since they are hand me downs from Miss A.

8.31.2011

Nursery *Progress*

I hope everyone who was affected by Irene had no major damage and your power is back on!  We lost our power on Sunday for about 13 hrs and made MAJOR progress on the nursery.  Unfortunately, my cell phone wasn’t charged so I was unable to get pictures, but this is what I have.

Here’s a before – excuse the craziness of this shot, this was when we were working on our new Master, but you get an idea of wall color/curtains etc.

2011-08-24 09.37.59

The in-laws came over Sunday to help us, while my parents took the girls’ (as they never lost power) so we could work. 

The carpet was torn out – only to reveal that the hardwood floors under this rooms carpet were never finished.  They are smooth to the touch, but still need a light sanding as there is joint compound all over as they were messy.  And thankfully, the Hubs found a water based finish, so the smell should be minimal.
We also got the ceiling/trim/upper portion of the room painted and the Hubs patched a hole in the wall from where our tv hung.

2011-08-31 13.48.11

Here you can get a peak at what I’m talking about above with the floors.

2011-08-31 13.48.33

2011-08-31 14.40.51

I went around this afternoon and did any necessary touch-ups on the wall color and painted down closer to the paneling that the Hubs actually finished installing tonight.  He is 3/4’s of the way done with the top molding and then the shoe molding will need installed. 

Will have an update on the rest of the room next week, as the goal is to be done by next week!

8.25.2011

Master Bedroom *Progress*

Thought I’d do a little re-cap over the progress we’ve, I mean mostly the Hubs, has accomplished in the past couple weeks.

Here’s two pictures post Avalynn moving up to her new room.  But you get an idea of the horrible closet that some previous owner installed.
2011-08-08 09.43.55

2011-08-08 09.44.07

Demo time.
2011-08-09 09.11.40

2011-08-10 12.38.14

Room emptied out completely, ceiling and trim had been painted at this point. 
2011-08-23 21.46.51

I helped cut in the room and the Hubs did all of the rolling.  I just can not roll paint.  The color we used was Valspar’s Gravity, we got their Signature Collection, primer/paint in one.  The Hubs and I were so happy with the coverage on this.  We did have to touch up some spots where we had cut in, more difficult to get that one coat coverage with a brush. 
2011-08-23 22.49.35

Shot of the room the next morning.  The Hubs was up until 1:30 scrubbing drywall and some paint drops off the floors.  He used Goof Off and some soapy water along with a sponge.  Then he put a coat of polish on everything. 
2011-08-24 09.34.25

Only thing that has changed from this picture to now is that our bed is in there.  We’ll be heading out soon to get the finishing touches on the room.  Also, probably after B’s arrival we plan on DIY’ing an upholstered headboard. 

I'm linking up to:
Join  us Saturdays at tatertotsandjello.com for the weekend wrap 
 up           party!

8.11.2011

Two Girls Sharing a Room

2 weeks ago, the Hubs and I spent 3 days working on combining bedrooms, the youngest was being moved up to the oldest’s room.  This included an Ikea trip, painting furniture, going through everything in the room, and getting rid of old furniture. 

It’s been an adjustment as both of my girls’ are not late sleepers, I mean that 6:30am is the normal wake-up time.  But now, it seems a couple times a week one of them wakes the other up before 6.  Thankfully, now they can entertain each other so I try and not to get out of bed until 6:30, some days they just aren’t having that though. 

Now for some pictures, these were all taken with my cell phone, and I don’t have a true before, we were already started by the time I thought to take room pics.

First up we have some pics of painting the beds.  We primed them twice with Kilz Primer and they only needed one coat of an oil based white paint I had used last year for our dining room furniture. 

2011-07-26 10.05.16

2011-07-26 22.35.15

Going through everything in her room.  And if you notice the brown hand swipes on the chimney, it’s not what you are thinking it is.  Around Easter this year, we went through a phase of the oldest sneaking chocolate in her room and she decided it’d be fun to smear it on the walls, def. NOT my idea of fun!
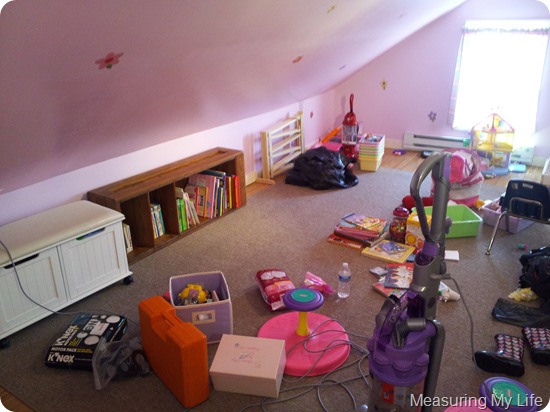
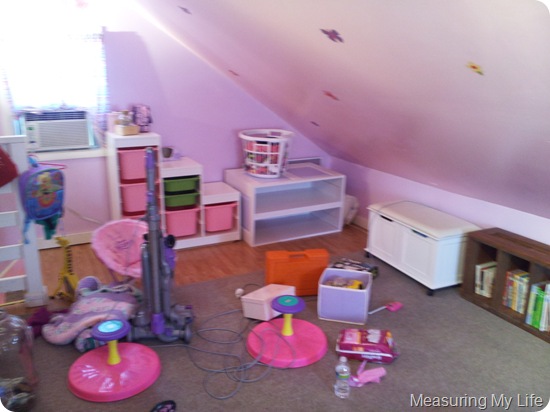
2011-07-27 10.08.59

2011-07-27 11.31.39

2011-07-27 11.31.56

Ah – and the after pics. Freshly painted chimney.  Tons of storage filled with things so it’s out of site and the toys have been purged, as we have birthdays and Christmas in the next few months, I knew I had to make some room.
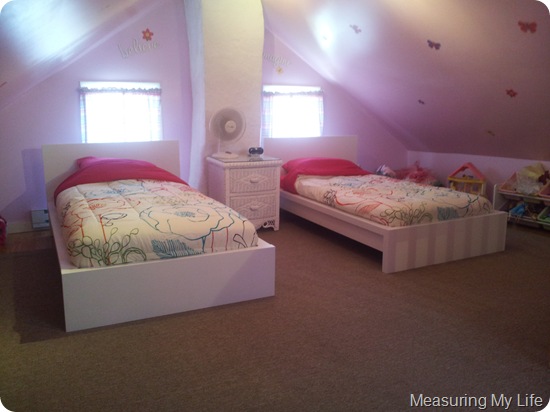
2011-08-01 15.52.34

2011-08-01 15.52.47

2011-08-01 15.53.00

When the youngest is out of the crib, we’ll actually be making a cubby system against that railing and also creating a BIG magnetic chalkboard for the girls’, DIY of course! 

Overall, am SO happy with how everything turned out! 

Here’s the breakdown on cost:
IKEA – $350 – 2 bed frames, the 3 tier bin system plus bins
Bedding – $115 – 2 sets of sheets, comforters, pillows, and 1 mattress pad, all Target – thank you college dorm sales right now!
Paint – $0 – For the beds and chimney.
But we sold her wicker bed set and a children’s table on craigslist for a total of $245.
Total: $465 – $245 = $220!

8.04.2011

Baby Stuff on the Brain

I decided early on in this pregnancy that I was going to conquer my sewing machine and make everything for Miss B’s nursery.  I had a little practice sewing up some burp rags for 2 of my friends baby showers in the Spring. 

First up I went to Joann’s and picked up some fat quarters and flannel for the backing.  Here’s the finished 11 burp rags.

IMG_8625

IMG_8629

I also knew I wanted to make her a quilt.  I was reading through my daily reads and saw this one that Jessica from Happy Together made for her oldest daughter.  I instantly fell in love with it, the pattern is actually from Oh, Fransson!, here.

Then the dilemma of what colors I wanted to be in the nursery.  Originally I started looking at fabric lines, where everything would coordinate.  Then I decided to go to my favorite place Etsy, where I just bought fabrics that I liked and thought would go relatively well together.  I got everything from SewFreshFabrics and was impressed with the quickness the fabric arrived.

IMG_8606

Let me just say that I pre-washed all of these and oh man what a pain.  Lesson learned to get some starch to help with wrinkles, it felt like it was never ending ironing.  The Hubs made me up this template from a heavy placemat we picked up at Target. 

IMG_8632

It took me 2 nights to complete the front, excuse the poor lighting, it was late and I wanted a picture, still need to take a better one in the daylight.

2011-07-18 22.24.46

Now to get a flat sheet for the back piece, batting, and finally binding it all together.  I can’t wait to share it when it’s finished finished.  Overall, for my 1st quilt, am really happy with how it turned out. 

Next on the list:
- Finish Quilt
- Make crib bumpers
- Make crib skirt
- Make some crib sheets
- Make a mobile
- Recover cushion on rocking chair/make some throw pillows
- Make new boppy cover

So, much to do, am hoping in the next week or two that the Hubs will take me out to Lancaster, as there are tons of quilt shops and I can find the rest of the fabrics to finish these projects up.

7.07.2011

DIY Fountain

A couple of weeks ago, the family and I headed into Joann’s so I could pick up some fabric for the baby.  Hubs was immediately drawn to the 70% off clearance sign over some big heavy flower pots.  After finding two different sized versions of the same coloring he threw out the idea of making a water fountain for our big flower bed, as it’s sparse and could use something like that in it. 

The big pot originally marked $80, came down to $23, and the smaller pot originally marked $50, came down to $15.  Our house is older and we have no outside electrical outlets.  So, the next day he headed to one of our local hardware stores and bought all of the electrical things needed and a pump to make the fountain a fountain. 

Before starting on the electrical, my Uncle (who is an electrician) stopped by so the Hubs could double check everything he had planned and make sure that it was the right way to do it and it’d be up to code.  As not only is the fountain an improvement to the garden, but the added outdoor outlets is an upgrade to our house.  He gave us some supplies so we were able to return over $100 to the hardware store.

Overall, shopping and working time it only took the Hubs 1 day to complete this project. Total Cost = under $200

Now for some pics:
IMG_8488Here’s a shot of the pots positioned next to the outlet the Hubs installed.  He also painted some Kilz Primer we had on hand on the insides of the pots. 

IMG_8489Containers of rocks I picked up at Target.  Still need to get one more jar.

IMG_8490
Shot of the Hubs filling the pots for it’s test run below.

IMG_8492

IMG_8493

Overall, am so glad the Hubs thought this up.  We love hearing the fountain, especially during the many night time swing sessions the Hubs and I have in the yard.   And we finally got around to getting our mulch this past week, so it definitely looks more finished instead of the dirt look we have going on above.
Linking up to:
Somewhat SimpleTransformation ThursdayHookingupwithHoHBWS tips button

6.14.2011

New *Summer* Wreath

I love hanging wreaths and other such things on our front door.  Sadly, it’s been bare since Valentine’s Day.  I attempted to make something like this, but only got 1/3-1/2 way done.  It’s sitting in the basement right now in a pile of other things to be finished.

Am sure you’ve seen those felt rosettes floating around blog land, I instantly fell in love with the simplicity of them.  I knew I wanted to do something with them, so I rummaged around in the basement, found a straw wreath form, some leftover burlap from several previous projects, and picked white, yellow, and a very pretty bright blue felt.  30 minutes later this is what I ended up with. 

IMG_8390

IMG_8395

Total Cost: $0

I know it’s the little things, but this seriously just brightened my day now that something is hanging on our door again, plus I made it which just makes me feel good to be doing something crafty again.