
Things we did differently/tips:
- Instead of buying a roll (250ft, cost $40) we bought 3-12ft cords, found with the light supplies for $6 each. This gave us 18 strands to hook up the jars to.
- Instead of washer's we just used some square things the Hubby had laying around.
- When drilling the holes in the lids, we screwed each lid center to the same jar, so all of the metal droppings would go into that jar and I wouldn't have to clean out 18 of them.
- After you figure out lengths you want the cords/jars, this step is done before tightening the hose clamp, once it is installed you'll need to move the jars around again to get the look you had before, the jars won't stay in the exact same place.
- When figuring out the lengths of the cords we had the hose clamp around them loosely. Then we wrapped masking tap right below where we had the hose clamp, this way we could take off the clamp to slip the cap on and knew exactly where we wanted to put it back on.
Here's some pictures of making it and the final results. We are SO HAPPY with how this turned out. Thanks again Kara for the wonderful tutorial! I'll be linking to these parties.
Picture of the jars in the case.
 |
Here's me drilling the holes in the tops. 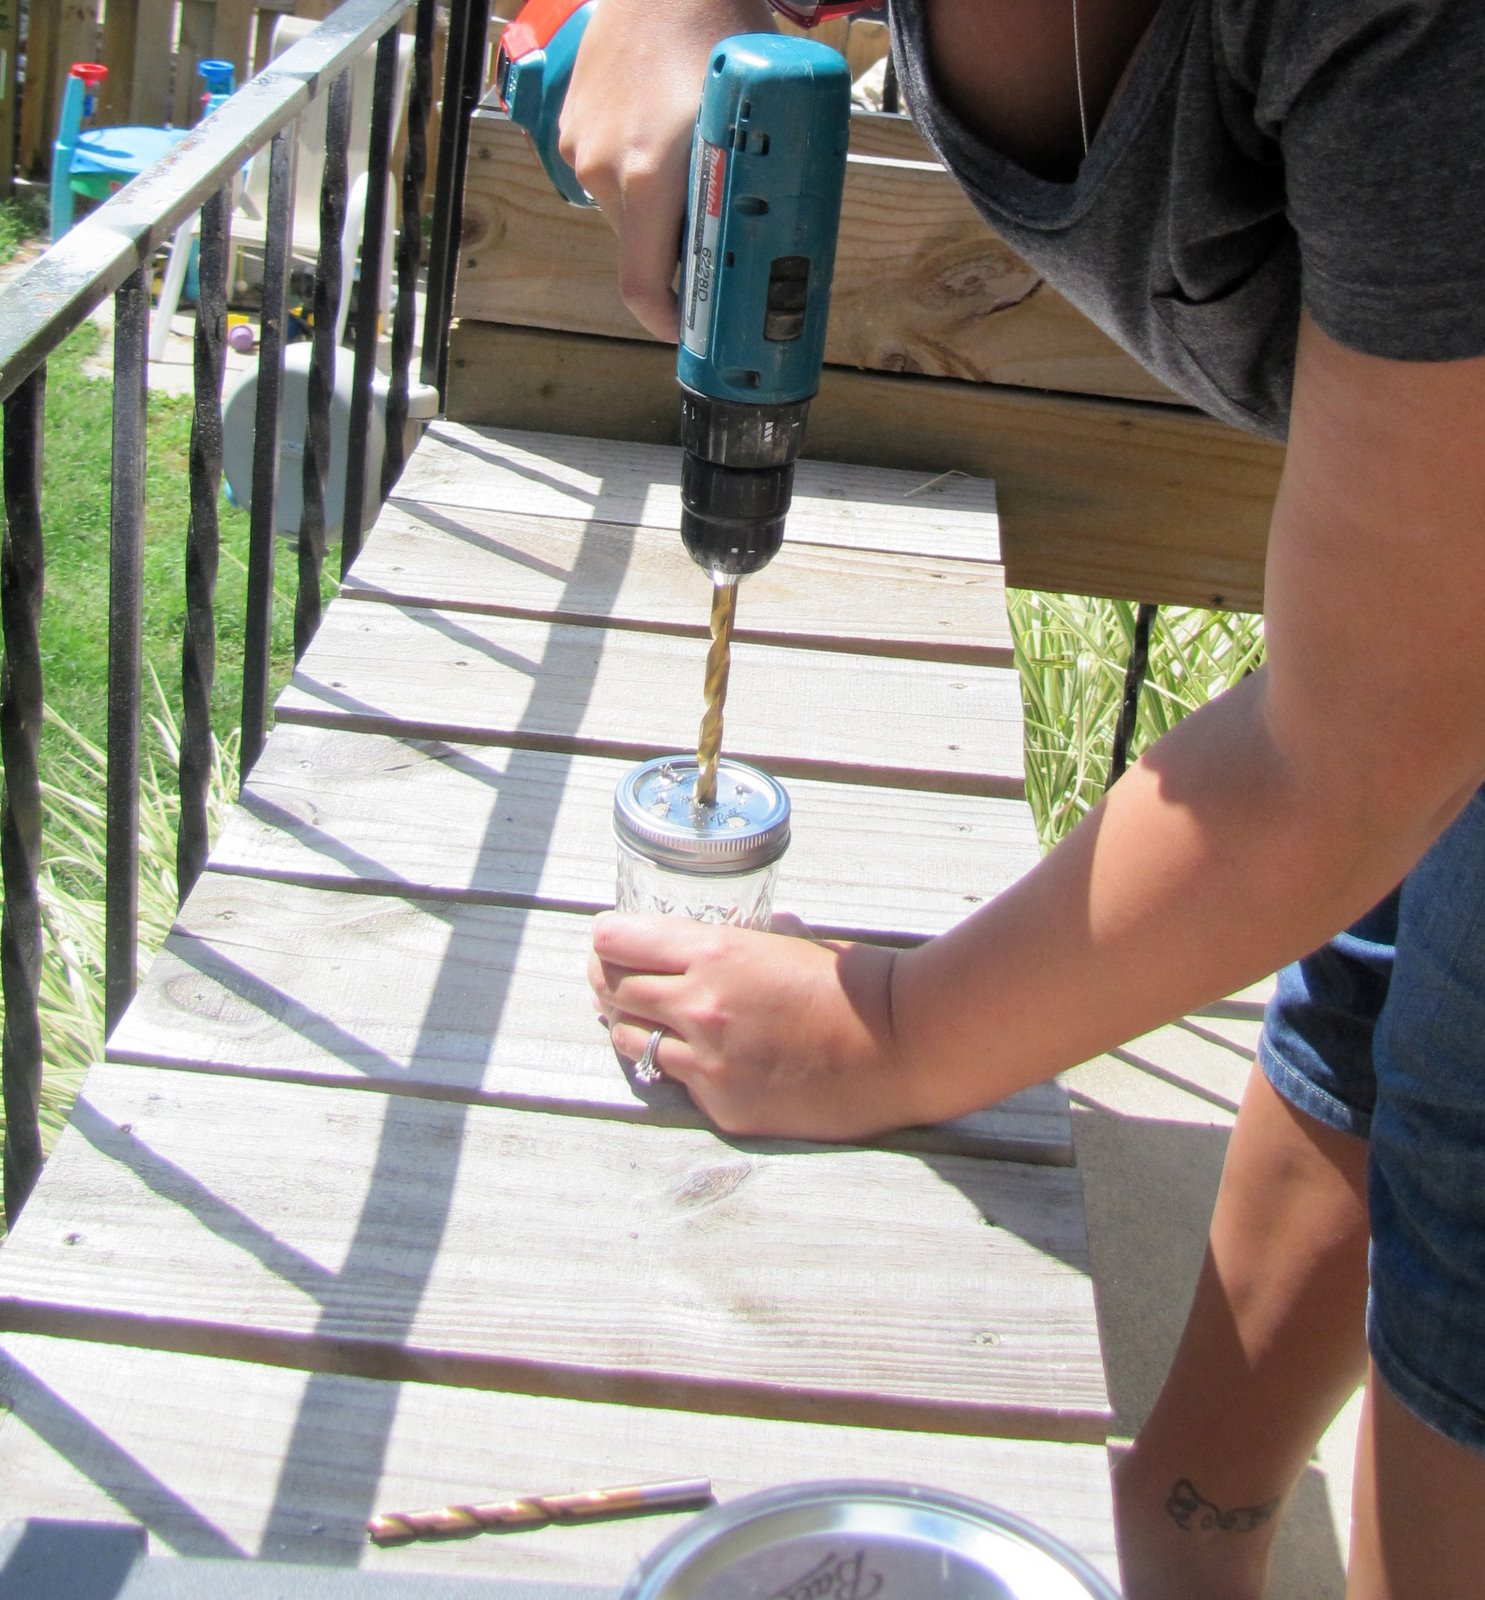 The square nut thing.  One of the lighted jars the Hubs did. *Added - we did drill extra holes in the lighted jars to let the heat have an escape*  The Hubs putting the hose clamp around the cords after slipping the cap on.  Here she is all lit up = GORGEOUS!  An unlit view of it.  |

60 comments:
You have way more patience then I do! Your husband gets a big gold star too!! Seriously yours looks better then the ones I've seen in magazines!!
I have seen these, but I never have seen one that was a DIY...it looks GREAT!!!!
Blessings,
Linda
Very impressive!
I absolutely LOVE this! Have you read anywhere about having to be careful with mason jar lamps? You have to be careful about the light giving off too much heat and making the glass explode. It may be a myth, I just had found that when researching how to make one. I imagine if you drilled extra holes in the top that would provide an escape for the heat and solve the problem.
This is definitely the prettiest mason jar "chandelier" I've seen! Amazing job!
That's a really neat idea!!! I've never seen that done before!
Wow! That is so unique. Pat yourself on the back
Cheri
This is fabulous, I'm with Laurie, yours does look better. Love that you and your husband does projects together. Thanks for sharing.
Joyfully,
Elizabeth Ann
My hero for the day...You and your hubs! This rocks!!!!! Thanks for linking to Thrifty Thursday on Tales from Bloggeritaville.
HUGS!
Leigh
www.lbratina.blogspot.com
SO CUTE! I love it. I am so glad that I found you through Hooking up with Hepworths! Good job!
Thank you all for the sweet comments!
Emily - In the directions it did say to drill 4 extra holes in the lids of the lighted jars, plus the Hubs checked the heat once we had them lit. Thanks for the tip!
As for the Hubs, am SO lucky we do the majority of our projects together.
VERY cool, and I like your adjustments.
LOVE it!! I've seen the same posts about the jar chandy and need to try it somewhere too. My mother in love would gasp and say...I need those to make fig jelly. lol
That chandy is so.awesomely.cool. Y'all did a great job!!! It's so lovely. TFS! Laurie (new follower) Come see me sometime at http://sceneofthegrime.blogspot.com
I would love to have you join me tomorrow over at our Sassy Sites blog party! It's our Feature YOU Friday! Come by and check it out! xoxo
Marni
@ Sassy Sites!
Wow! Talk about impact! I mega love this idea! PB has one in their catalog but I think yours looks nicer. Thanks for the good instructions - I have bookmarked it for a future DIY project.
Jennifer
Those look great! I'd only ever seen them hung as a single lamp, not a chandelier. I love the look of the chandelier!
Oh, I really love this...I am bookmarking it for later! You did a great job!
You did SUCH a great job, Kat! Your chandelier is BEAUTIFUL! Looks better than the ones in the catalogs! :)
I love it!!! Can I feature this post on my blog???
Stacy @happyhappyhousewife.blogspot.com
Very pretty lit. Can you imagine using vintage blue jars? Followed your link over from Fab Friday. Drop by Atticmag and leave a comment for your chance to win Roxy bedding for Giveaway Friday.
Allison
Atticmag
Great job! I love the look!
Oh, very cool! Nice work!
love it! found ya on me & my bucket. come visit sometime. your newest follower! :)
very very cool idea! Coming over from SITS
You must get so many comments on this from your guests! What a conversation piece! I love it, and thanks for such a great tutorial on it!
I love this! How adorable!
I love it and how original it is! Great job!
This is awesome!
It turned out great! Thanks for linking up to Show and Tell Saturday!
I would love it if you would add the party button to your post or your sidebar to help promote the link party!
Thanks.
i have a similar one bookmarked too for the future. thanks for sharing this one and your tips :)
What a fantastic idea, I love it!
That is just wonderful! I am very impressed and thanks for the tips!
smiles, alice
Simply GORGEOUS! Fantastic job. Hope you have a wonderful weekend. ~ Stephanie Lynn
GREAT job! I actually shared Kara's DIY last week on my blog.
http://buggieandjellybean.blogspot.com/2010/09/mention-me-monday-sept-6th.html
Glad to see another person was able to achieve the look. More assurance for me!
xo
Amy
Fantastic!!!
What a clever idea! You did a great job. Thanks for all the tips to make it easier and cheaper!
This is just super cool! I love how it looks all lit up! Thanks for sharing at My Backyard Eden!
Too cute! Very imaginative. I can imagine this on a screened porch or hanging from a tree in the backyard.
LOVE THESE!! I've seen them in the PB catalog and just love, love, the look. You and your husband both deserve gold stars for the vision and patience it took to do this project! Thanks for the inspiration. (PS: I'm visiting you from It's So Very Cheri). Take care, Becca@AdventuresinDecorating)
Nice work! That looks great (:
looks fantastic! great work!
Hi! I'm visiting from Met Monday and just wanted to tell you how fabulous your mason jar light looks! I am so envious of folks like you who can do these crafty and creative things! Great job!
Vanessa
http://southerninmyheart.blogspot.com
I like your unique take on the mason jar chandelier. It looks fab!
This project, or one like it, would be a perfect fit for my Time Travel Thursday linky party. The link goes up Wednesday night.
I would love to have you join me for one, or all three, of my parties each week.
By the way, I just became a follower.
Liz @ the Brambleberry Cottage
http://thebrambleberrycottage.blogspot.com/
i saw this recently...but there was NO tutorial! im obsessed..great job!!! come on over and link up to MMM!
It turned out great! What a fun idea! Thanks SO much for joining in on Thrilling Thursdays @ Paisley Passions. I hope to see you again next week :)
~Lori S.
Thrilling Thursdays @Paisley Passions
Don't you love KAra and her amazing ideas. I bought the chandelier from her bacuse I was way too intimidated to make it. Good for you for tacklling it!
Well done! The project looks wonderful. I hope you enjoy it for years to come.
Very cool!
http://evenings-and-weekends.blogspot.com/
That is pretty cool. I was thinking that it might also be cool to coat the jars in a translucent color...mix some food color or ink with some mod podge and paint away! Thanks for the idea!
very cool :)
Wow that is so cool! What a fun idea.
That's pretty neat! I saw your chandelier posted on a Home Improvement Forum.
I love it! You did a fabulous job.
This is simply fantastic. So clever and so creative.
I'm so impressed - what an awesome project!
Totally digg'n it! Thanks for linking up to Mad Skills Monday!
Oh, I like this! Where does in hang in your house? I'm a new follower.
This is amazing, I love it!!! Have a wonderful weekend!
XO
You have been featured at SSB!!! Check it out at the link below:
http://superstinkyboys.blogspot.com/2010/09/mad-skills-monday-link-party-26.html
Feel free to snag my I was Featured button for your blog and display with pride!
xoxo
Ginger
What a unique idea! It looks like an expensive fixture you may see in a vintage magazine or book. Great idea!
Post a Comment