Showing posts with label Decorations. Show all posts

12.13.2010

Garland & More Garlands

I have to be honest, I never truly appreciated a nicely done garland until I entered bloggy-land and started seeing everything everyone does!  I have 2 ragamuffin garlands that I made for our one archway and our porch door.  For more on the ragamuffin garland go to this post.  And the banister garland is all stuff that I had bought after christmas on clearance 2 years ago and put it together last year.  Plan on going out to the craft stores this year to pick up some more goodies to make it more full for next year.  


Photobucket

12.06.2010

Decorating Chaos

A few years ago, I would go nuts trying to do all of the decorating in 1 day.  Yes - nuts I tell ya! Then I learned to take my time over a few days and the past two years I work on it the week of Thanksgiving.  The Hubs runs the basement stairs, sliding the bins on the small landing for me to push out of the way.  

First I went around and grabbed all of my fall decor & everyday decor off the shelves, lamps, and tables and piled everything on the dining room table.  Then I started opening up my bins to see what goodies were in stores, seriously amazing all of the stuff I forget I have.  

So, instead of just posting all of the pretty decoration pictures, figured I'd show what it really looks like during the madness of getting it all to look nice.  Love that Avalynn is chomping on some of her non-breakable Target $1 Spot ornaments...


Photobucket

4.06.2010

DIY - Tissue Paper Flowers

Next weekend on Sunday the 18th we are having Baby Girl baptised.  I'm beyond excited and looking forward to celebrating with our families afterwards back at our place.  Since Hubs is still laid off (entering 5 months now) I decided to scrounge around and come up with some inexpensive decorations that I could make.

I went to the Dollar Tree and picked up two packs of tissue paper.  Can't beat $2 for this project.  Already had on hand the floral wire, wire cutters, and scissors.  I made two different sized flowers.  The first you will see is using the full sheets of tissue paper.  The 2nd version I just cut the paper in half.


I started off by pulling out all of the pink pieces and lining them up. 


I started accordion filing the paper, approximately 1-1 1/2 inches wide.


I then cut the both ends, so they were rounded.


I wrapped a piece of floral wire around the middle and started pulling up the layers.  This is half of the flower done.


Here's what the full flower looked like.


Here's the 2nd version - using half a sheet of tissue paper.


Forgot to take a picture, but for this flower I cut a pointed arrow on each end.  Here's half the flower pulled.


Both of the flowers completed.


I have a few more to make and plan on hanging these from the ceiling over the food tables in our dining room.  I can't wait to see my vision come together! 

3.19.2010

Nursery Art on the CHEAP

In baby girls room there is a wide horizontal stripe, I knew that I wanted to fill it with some art.  Michael's was having BOGO canvas, 2 came in a pack.  So, I got 4 canvases for $5.99, spool of ribbon $1.99, 4 sheets of scrapbooking paper $4.  Already had on hand foam brushes and mod podge.  Unfortunately - I forgot to take pics but it's super simple!  Total Cost = $12!

Directions:

  • Cut scrapbook paper to size of canvas.  
  • Coat the canvas and back of paper with mod podge, smooth it onto the canvas. 
  • Measure ribbon to length to wrap around the edge with a little excess. 
  • Hot glue the ribbon around the edge, overlapping at the end. 
  • Hang & Enjoy! 

Here's the space I wanted the canvas to go. 


Here's close-ups before they were hung. 


Hung up on the wall. 


1.16.2010

90% COMPLETE-D Nursery

It took us a while to get moving on Baby A's nursery - I remember being done months before with Little One's.  We had it all early and set up.

This week we went out and got the last of the necessities and odds & ends that help complete the room.  Honestly the most difficult thing was finding some curtains, I ended up getting shears with some blackout curtains behind them.  Only thing left to do is for me to do my canvas wall art project at some point, get her name made to hang above the crib and a small shelf for the wall.

So, happy with how it's turned out - love walking into her room now.  Everyday I take some time and sit in the rocking chair and just look around and think about her and how are lives & family will be changing going from a family of 3 to a family of 4.


12.15.2009

Christmas Decor - Part Duex

Finally getting around to posting the rest of our holiday decor that we have around the house.

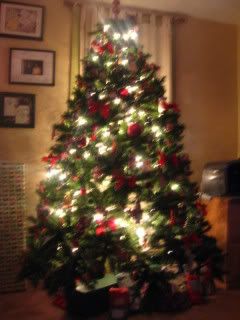
Here's the tree all trimmed out with our family ornaments, we have a mixture of handmade, hand painted balls, and special bought ornaments that have been passed down to us from our mom's and now as little one is getting older and making them at functions they are being added.  I love remembering who they all came from.


Little arrangement on the one end of our tv cabinet.
 

This is on the other end.  The deer and lantern were both yard sale steals - finds & just added some garland I ripped apart that my Gramma didn't want anymore.
 

My father-in-law made this nativity set.  For the past 3 years we've gotten 3 pieces each.  You can't really tell from the pictures, but these pieces are HUGE.  Beautiful but HUGE.  They do come with some lovely glass candle sticks, but we never light them. 
 

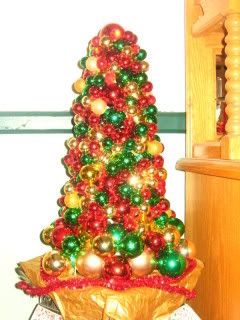
Chistmas ball tree that my mom made last year as a present.  Love it! 
 

This little guy my mother-in-law made one year, I think he's so just the cutest! 
 

I love this Santa candle, especially how it looks like ribbon candy with the design. 
 

This is on our bathroom sink, my friend made it last year.  I have a bright green bathroom and this just continues with the bright theme and love all of the colors. 


Here's a portion of our decorated wall of shelving.  Many homemade items on here also.


I love pulling out all of these goodies every year, especially the handmade ones.  They mean the most to me and I look forward to being able to pass these down to my girls some day, as some of them have been passed down to me.

12.14.2009

DIY - Christmas Gifts

In our families we always make a homemade gift.  Typically, I've done ornaments in the past and occasionally the Hubs will do something with his woodworking.  But this year with the Hubs working his crazy schedule I remembered two DIY gift ideas I'd seen around the Blog-land.

First, I saw earlier this year when Chris @ Just a Girl posted a tutorial - the ever so popular Tile Coasters.  Total cost per gift was $3-4.  You really can't beat that and they are super simple and go quickly!

Here's the materials we got: tiles from our local hardware store, a pack of the 12x12 cork tiles (4 in a package), staz-on ink in brown, package of clear stamps, and the spray sealant.

 Here's the hubs measuring out the size we needed for the bottom of each tile.

Bottom of the tile after the cork was glued on.

The finished product after stamping and the spray sealant.  We decided to have two of each design in each set.  We made 8 sets total.


The second gift I stumbled across were these amazing JOY plaques that I fell in love with instantly.  The tutorial is posted over @ Shanty2Chic. Total cost of this project for me was about $15 per set, I ended up having to order the candlesticks and finials online as my craft stores selection was pretty null.  I didn't take step by step pictures of this project, Hubs and me worked on them a little bit each day and are so pleased with how they turned out.  We made 7 sets of these.  Here's our finished project.


There's still time if you need a simple inexpensive christmas gift for someone.  Go out and get your supplies, they will love recieving something handmade.


And - when you happened onto my page did you notice that little one is entered in a contest?  If you have a moment please go take a gander over @ parenting by dummies and vote.  Little one's #28 in case you won't be able to tell, as her bum is the only thing you see and not her face.

12.10.2009

Christmas Decor - Part 1

I have a bunch of photos.  Here are some pictures of the garland I made this year and a rag-garland.  The worse part for me is capturing the glitter that's in the garland, just don't feel like the pictures have the sparkle it does IRL.  Everything including the greens for this garland I got on clearance last year after Christmas!!!  I ended up winding 3 greens together to get it thick enough and then just kept on sticking and wiring in the goodies I had.  Love the green and bronze colors.


Here are some close-up's. 


Last year my mom made me this button wreath and it needed something added up above, so in a couple hours I whipped together this rag-garland, I have another longer one in the big arch of our living room.  And love the look of our door now. 


12.03.2009

Cinnamon Dough Ornaments

Last year around the blog-o-sphere I saw tons of great Christmas decor ideas and I knew I wanted to do the cinnamon dough ornaments, after seeing them here and there.  After Christmas last year was walking around Target when there in the automotive section was a lonely red shiny tree with a red glittered bottom for only $2.49.  I was so excited obviously someone had put it down after changing their mind but alls I was thinking was SCORE!  So, it's been sitting on a shelf in my basement ever since.  I dug it out the other day and looked up a recipe and here's what I came up with.

Cinnamon Dough Recipe
Ingredients: 3/4 cup of applesauce (do not use homemade) & 1 cup + 2 tbsp of ground cinnamon
Directions:  Preheat oven 250 degrees, mix ingredients, use cookie cutters for desired shape, use a straw to make a hole for your ribbon/rope, place on cookie sheet, put in oven for 2 1/2 hours, flipping them over occasionally.

Here's my tips:
  • This was a very very very wet dough to work with (ok, I wouldn't even call it a dough, it's mush), sprinkle ground cinnamon on surface you plan on rolling it on, sprinkle on top, and coat your rolling pin several times throughout the rolling process.  
  • When placing your holes make sure they are far enough down if it's a narrow shape (like snowflake) so there's no cracking.
  • Easiest way to transfer these to a cookie sheet, is to coat a spatula with some cinnamon and slide it under your shape, the excess areas will break away.  I started trying to use a knife, but b/c it's mush, it wasn't working very smoothly. 
Here's a picture of them before transfering them to the cookie sheet.


After letting them cook, I broke off any excess little pieces from the sides.  Used some red and white baker's twine I had around and hung them on the tree.  Only disappointment is they are sort-of hard to see on the tree.  But they do smell rather yummy when you walk by.


12.11.2008

Sugar Cookies, Snowflakes, & Tree's - OH MY!

So, here are a bunch of pictures that I've been uploading throughout the week, and have been wanting to share...
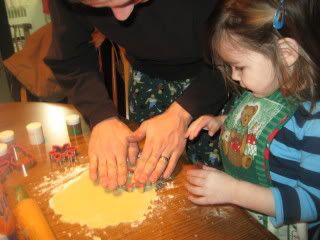
Emma and daddy prepping the dough to be rolled.


Watching.


She loved playing in the flour.


Her new "cheese" face with a wink thrown in.


Getting ready to help daddy push down the cookie cutter.

Photobucket


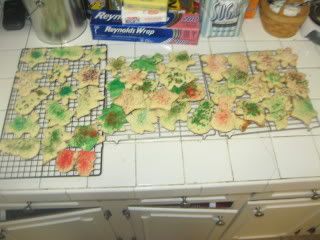
The end results, yummy! Emma decorated them all.
Photobucket


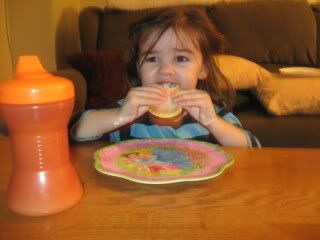
Taste Testing - I think they got two thumbs up!
Photobucket


Enjoying some homemade chex mix and smiling at daddy!
Photobucket


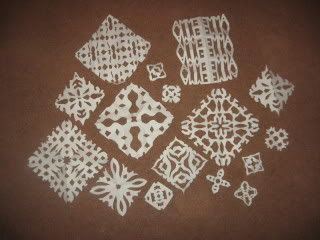
Snowflakes that the hubs and me did. He did the Emma one, which I think turned out awesome!
Photobucket


Playing around with my camera trying to get a night shot of the tree.
Photobucket


Look what I figured out to do. It was lots of fun! :o)
Photobucket

Tuesday night I swung by my mom's to pick up some craft stuff and she surprised me with having this christmas ball tree for me that she finished earlier in the evenings. Isn't it gorgeous?

Photobucket


And had to try out the fun light shot on this too.
Photobucket